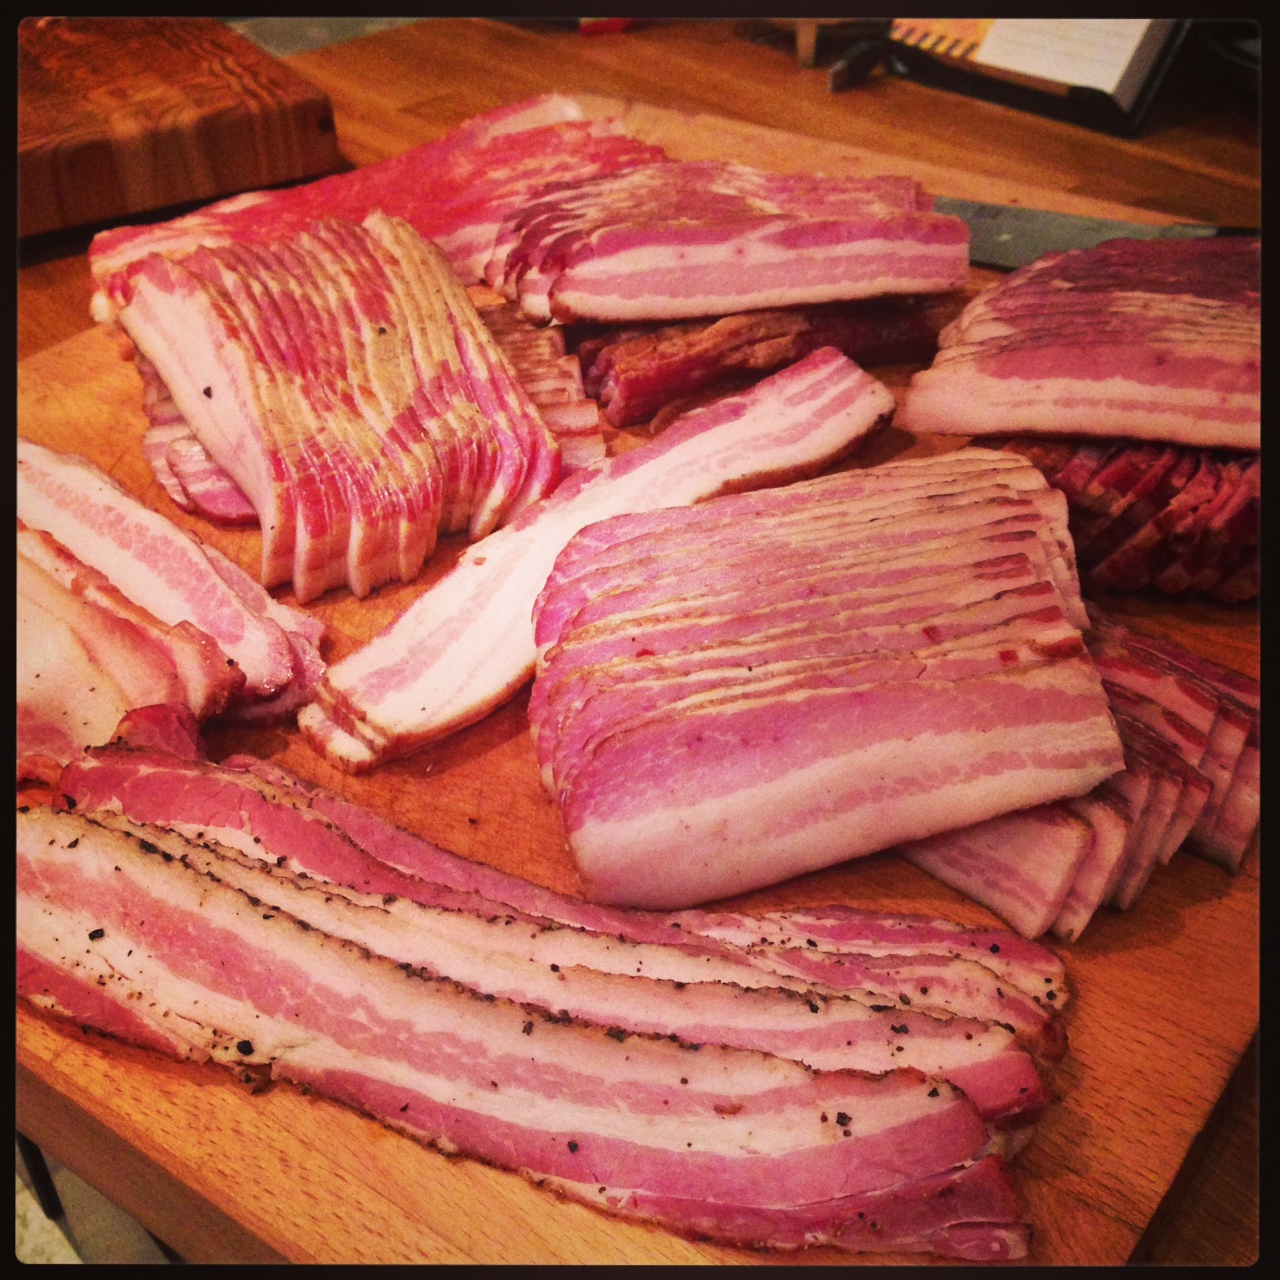
This is the end result we’re after
This is the second part of my post on homemade bacon experiments. In part 1, I described the prep and curing process. After that was done, everything sat sealed up in the fridge for 5 days to let the cure do its magic.
On the 6th day, I took the bacon out of the vacuum sealed bags and gave it a good rinse. This is an important step and if you don’t rinse the cure mixture off, you’ll end up with a very salty final product. It’s a good idea at this point to slice a small piece off and fry it up to taste. If it’s too salty, you can let the pork belly soak in some cold water in the fridge. Soak it for an hour, cut a piece off to cook and test, and repeat with fresh water until the salt level is where you want it.
Forming a pellicle
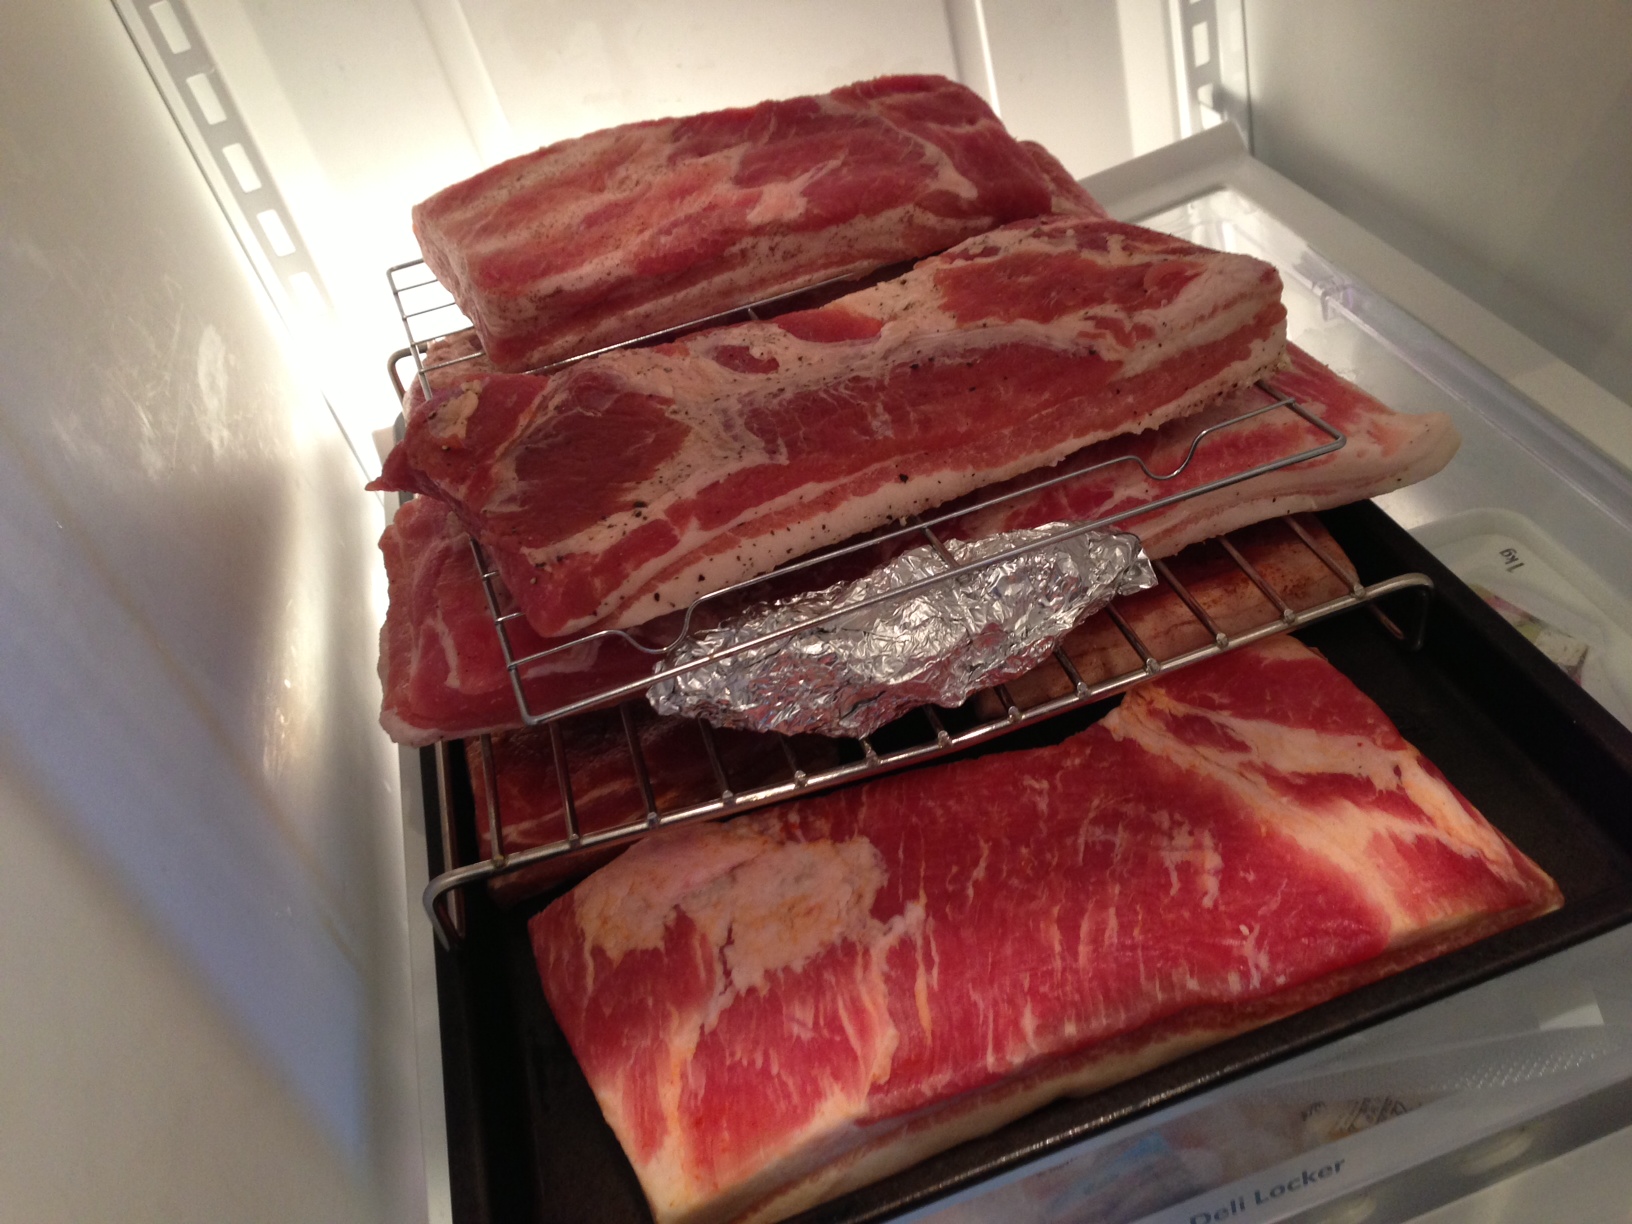
The next step is to let the bacon air dry to form a pellicle. A pellicle is a layer of protein that forms on the surface as the belly air dries. Smoke particles stick more evenly to a dry piece of pork belly (something to keep in mind when adding liquids such as maple syrup before smoking). I do this by putting the pork belly slabs on racks in my fridge – overnight is best, but a few hours will do.
Finally, the bacon is ready to be smoked. I do this on my homemade drum smoker, with a temperature between 200-225f until the internal temperature hits about 150f. This usually takes about 2-3 hours. I’ve played with using different types of wood, and tend to use either apple or cherry for a milder, sweeter smoker, or hickory for a stronger smoke flavour.
Once the bacon is off the smoker I’m always tempted to just dive right in and start slicing, but you have to let it rest. The liquid inside needs to settle, and the fat needs to cool. If you cut right into it, you’ll get a big sloppy mess. Cold bacon is also much easier to cut into even slices. I leave it covered on the counter for 30 minutes to cool, then into the fridge for at least a couple of hours. It’s already been at least a week long process at this point, so why rush now?
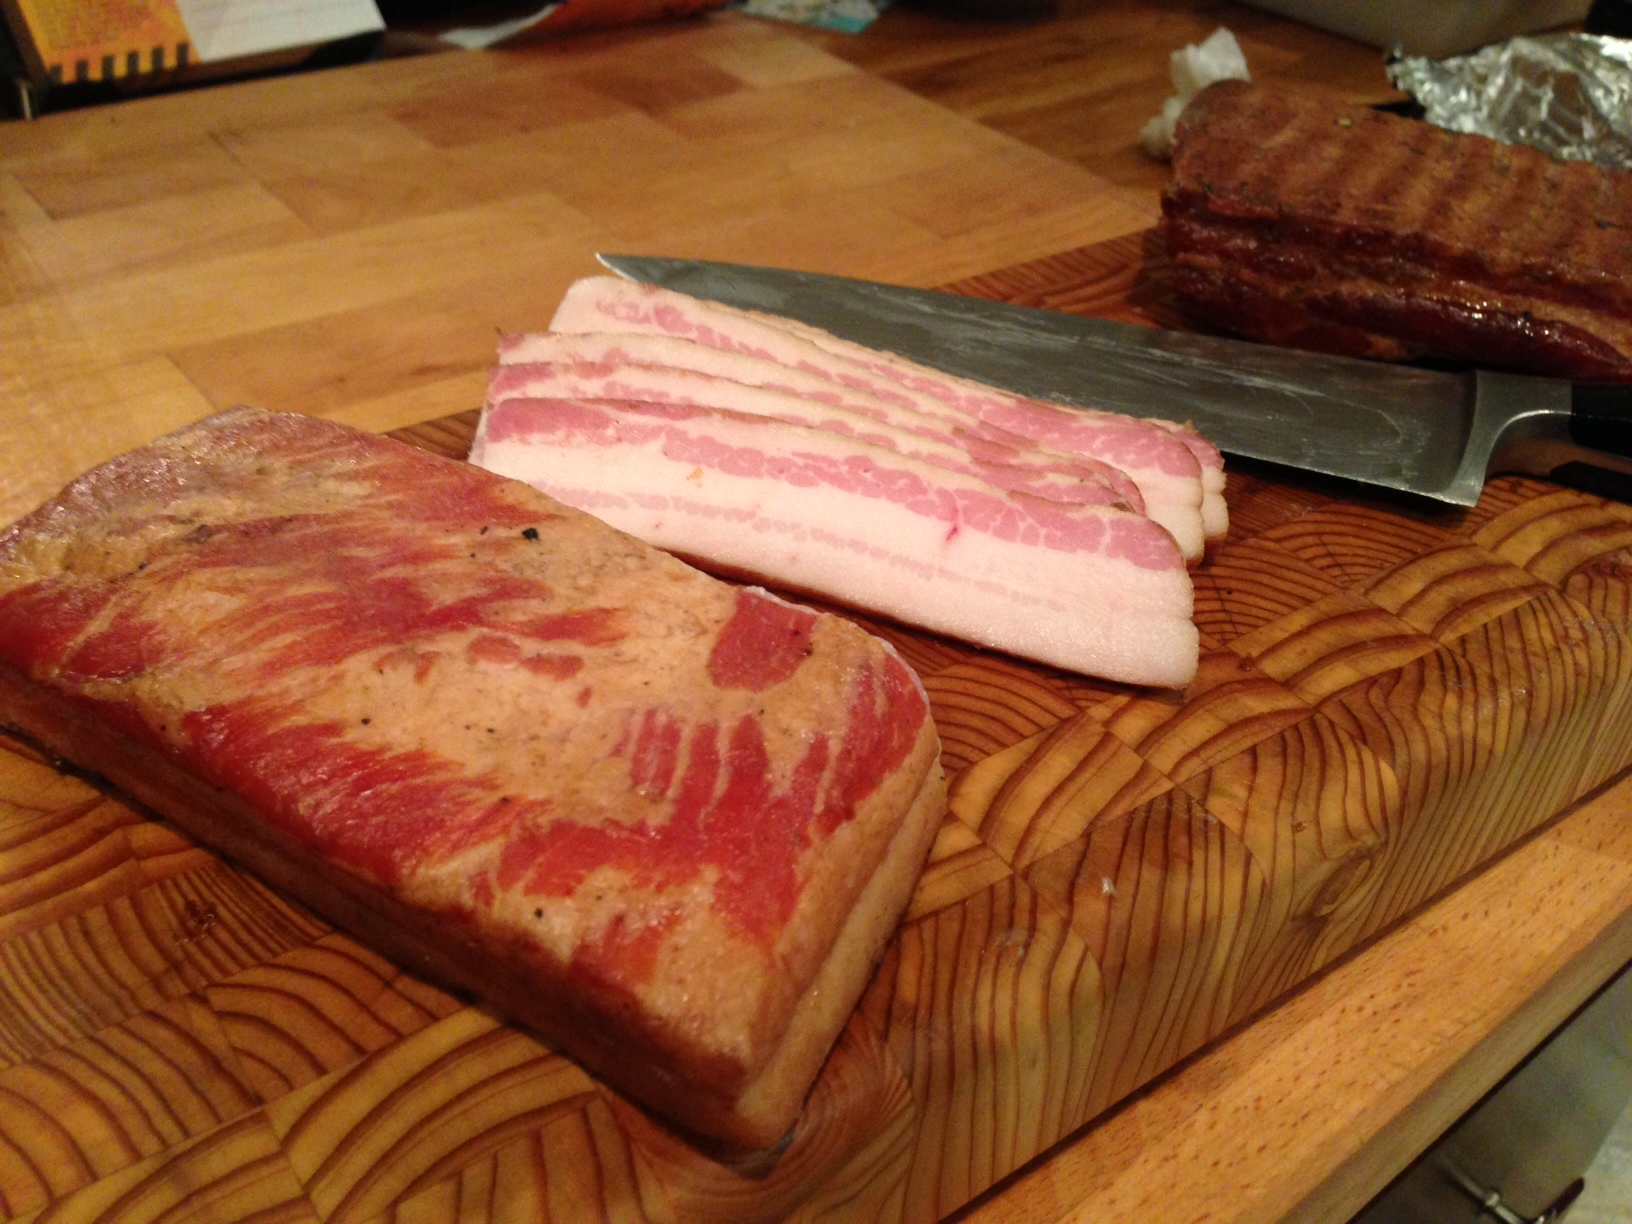
Once it’s rested and cooled off, the bacon is finally ready to be cut and enjoyed. One of the best parts about making your own bacon is that you can cut it up however you want. Thin slices if you want it to crisp up nice, or thicker slices if you want it a little meatier. I got all 8 flavour experiments cut up, then tried them all out (of course). Below are my notes on the different flavours:
- Honey and Sriracha – surprisingly mild, with subtle flavouring – will let this one cure for a couple of days longer next time I make it
- Cocoa chili, chipotle powder, cayenne pepper – flavours didn’t really take, probably won’t make this again
- Tikka masala – this was really good and had a strong flavour from the cumin – will definitely try again
- Adobo – meh – won’t repeat
- 5 spice / Red chili flakes – not bad, needs some sweetness, will try with brown sugar added
- Double Pepper: Black pepper and chili powder – one of my favourites, will try with more / different types of pepper
- Apple slices, apple cider, turbinado sugar, cinnamon – good – the cinnamon was just right, but it’d be nice with a bit more apple flavour – will try letting it cure longer, or with a more concentrated apple syrup, or dehydrated apple powder added
- Jowl – black pepper, dried bay leaf, fresh garlic – fantastic – such a strong, porky, flavour – I don’t know if it was because it was a jowl, or because it was from a berkshire pig – I have to get some berkshire pork belly to try out
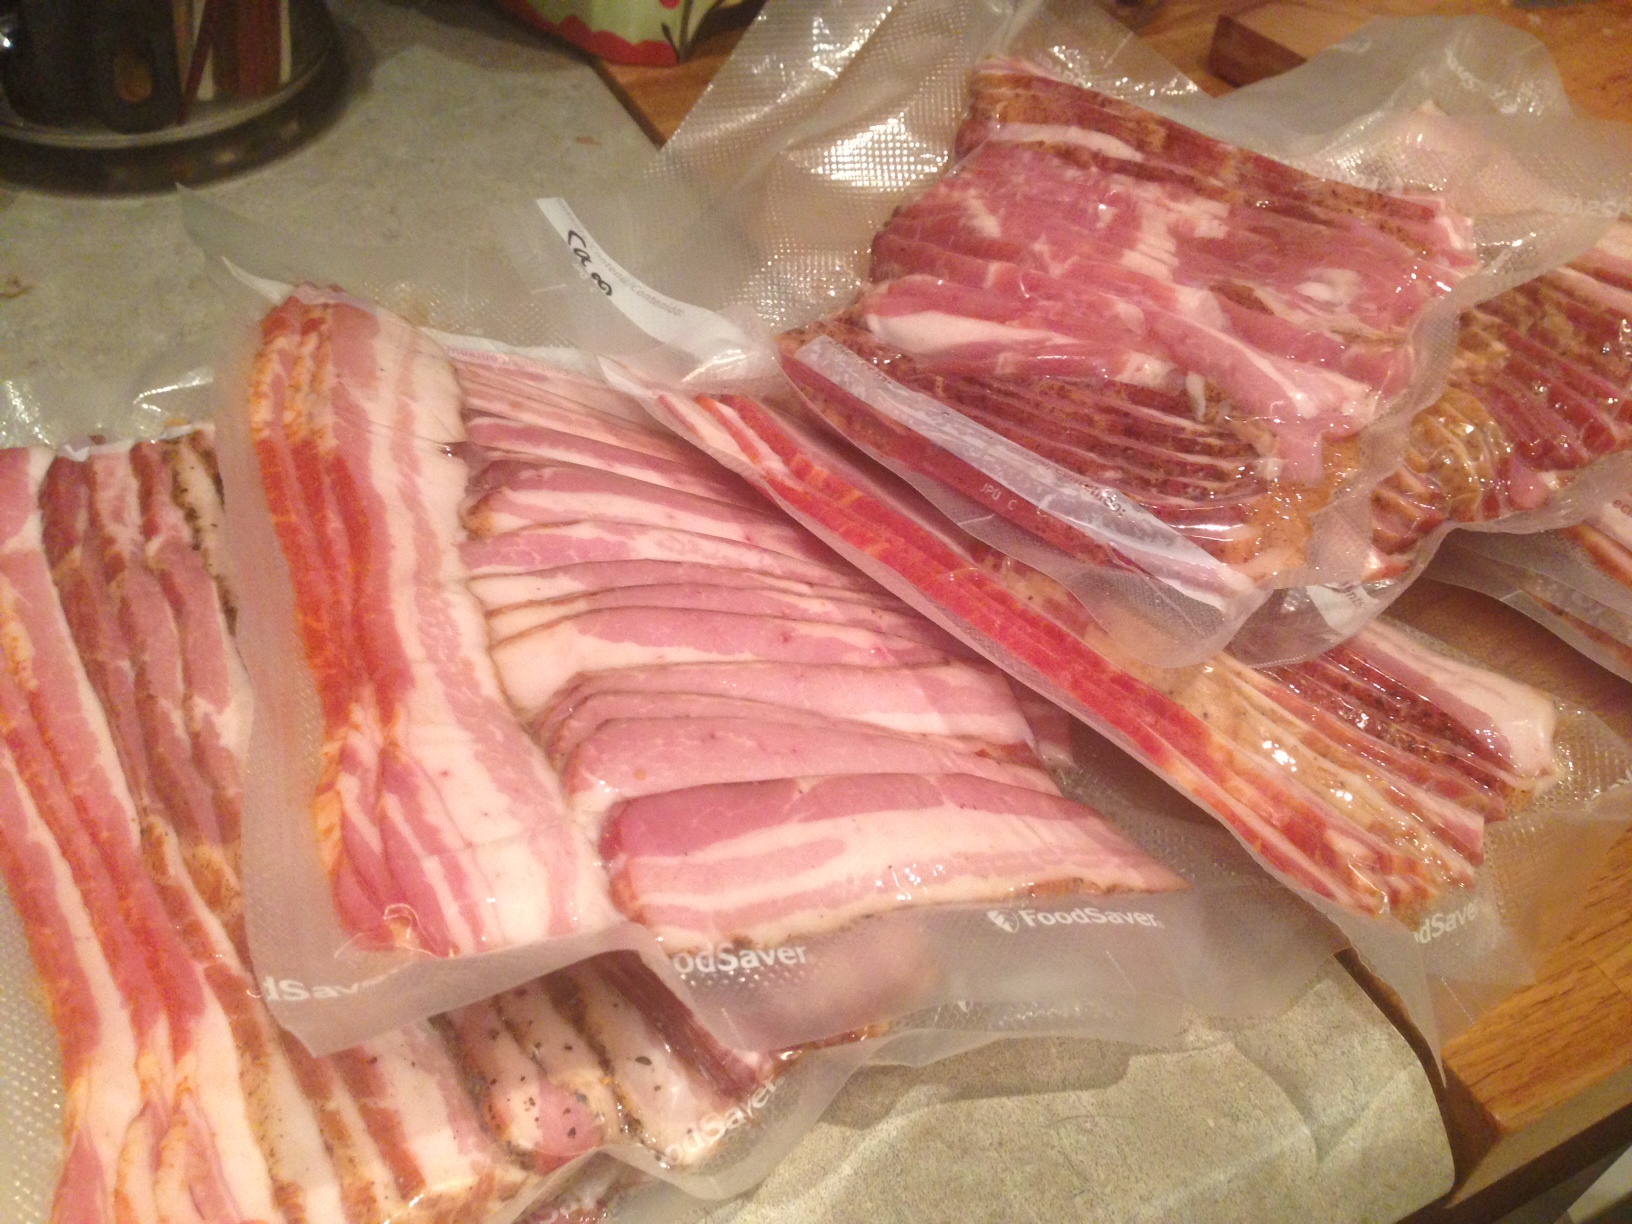
All sealed up
This bacon is cured, so in the fridge, it’ll be good for 2-3 weeks at least, and for months in the freezer as long as it’s sealed up air-tight. I give a lot of these experiments away to get feedback, so it’s not like these will stay in the freezer long anyway.
So, after a week, the result ended up being about 10 pounds of bacon, 3 flavours that came out awesome, 3 that need some work, and 2 that weren’t so great. Every time I do this I learn more, and I’ll keep working on the process to get better and better results.
If you enjoyed this article and you want to see more, like the MeatVentures Facebook page to be kept up to date on new content!
drool!
Hahaha, that’s the best kind of compliment to get!
[…] ← Previous Next → […]
Can you go into detail about the home made drum smoker? I am in the process of buying one for the house, but If I can MAKE one, that would be really cool.
I have quite a few pics of the whole build process, and I’ll be creating a post that show what I did. If you do a google search for “ugly drum smoker”, you’ll find quite a bit of info on how to put one together. I made mine with just a drill as far as tools go.