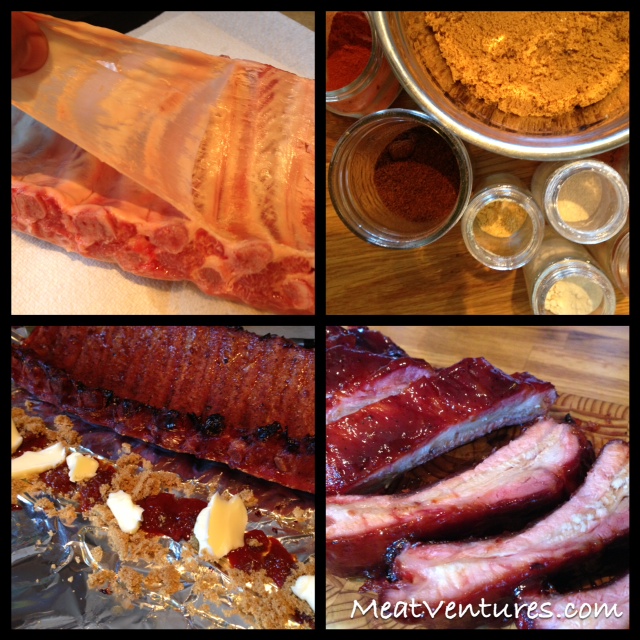
My brother and I entered our first BBQ competition last year at a county fair in Listowel, Ontario. We had a blast, and were fortunate enough to take a first place in the rib category. This year we’re going to try to get out to a few more, so we’re going to be doing a bunch of practice cooks. I did the first practice cook last week, and did a little write up of the steps I took.

Baby Back Ribs
The ribs provided at the amateur competitions are baby back ribs, so that’s what I used here. With competition judging, the judge may only take a single bite of your rib, so you have to make sure that they get a full burst of flavour in that single bite. This type of flavour is a little sweeter than I like, but for a competition, you’re cooking for the judges. The rib should be tender, but when bitten, it should leave a bite mark without all of the meat pulling off the bone.
For the level of tenderness I aim for, I cook in the smoker at 225f-250f for 4 hours. This gives me the results I’m looking for, but I do plan on trying cooks at a higher temperature of 275f or so as I’ve read it can help render the fat in the ribs better.
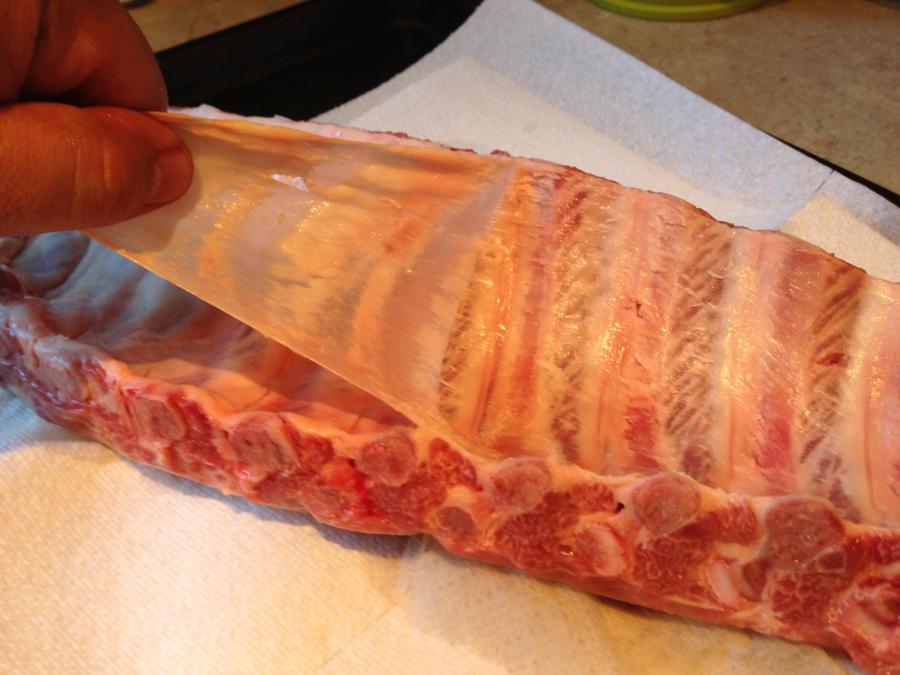
Removing the Membrane
The first step is to prep the ribs. For baby back ribs I usually don’t do much trimming; the only thing I do really is remove the membrane on the back of the ribs. This is a tough membrane that won’t render down, prevents rub from penetrating the meat, and when cooked has a gross, rubbery texture. So It’s a good idea to remove it before cooking. To do so, slip a knife under the membrane at one end, then grab it and pull it off. With a little practice, it should come off in one piece; using a piece of paper towel to grab the loose end makes it a little easier.

Making a Rub
The base of any good rib is the rub. The rub I make is as follows:
- 1 cup dark brown sugar
- 1/2 cup hot paprika
- 3 tablespoons kosher salt (if using table salt, use 2 tablespoons)
- 2 tablespoons mustard powder
- 2 tablespoons chili powder
- 1 1/2 tablespoons cayenne pepper
- 1 1/2 tablespoons chipotle pepper
- 2 tablespoons fresh cracked black pepper
- 2 tablespoons onion powder
- 2 tablespoons garlic powder
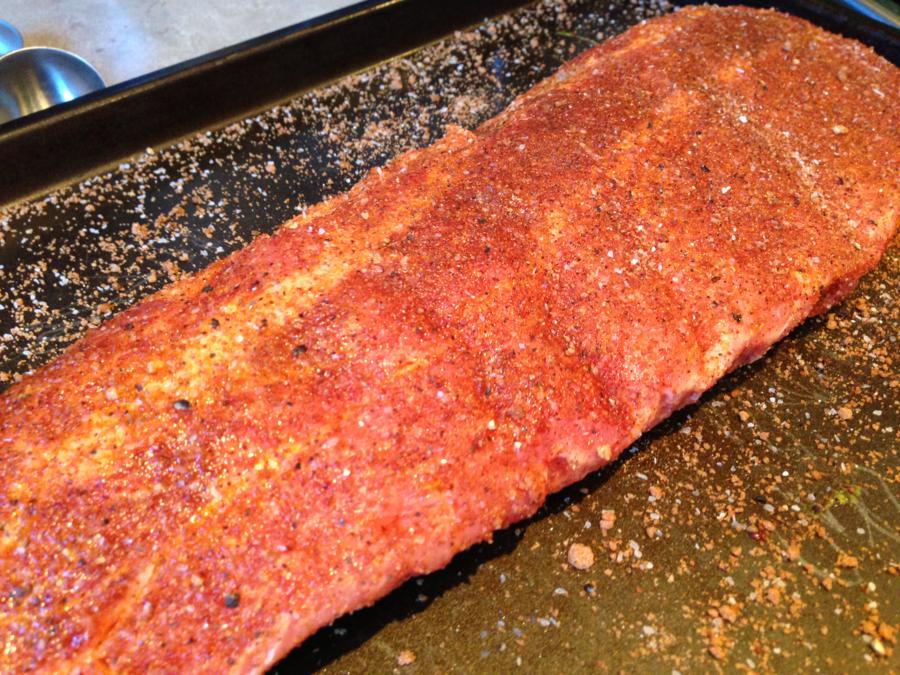
Ribs with rub
To make the rub stick better, I put a very thin layer of plain yellow mustard onto both sides of the ribs, then apply about 3 tablespoons of the rub. There won’t be any mustard flavour at all in the meat, this just acts like a bonding agent.
I then get my smoker steady between 225f and 250f and put the ribs on. I like to use Cherry or Apple wood for ribs, as they have a milder, sweeter flavour to the smoke. Once on, nothing happens for 2 hours – no peeking or opening the lid. Like the saying goes “If you’re looking, you ain’t cooking”.
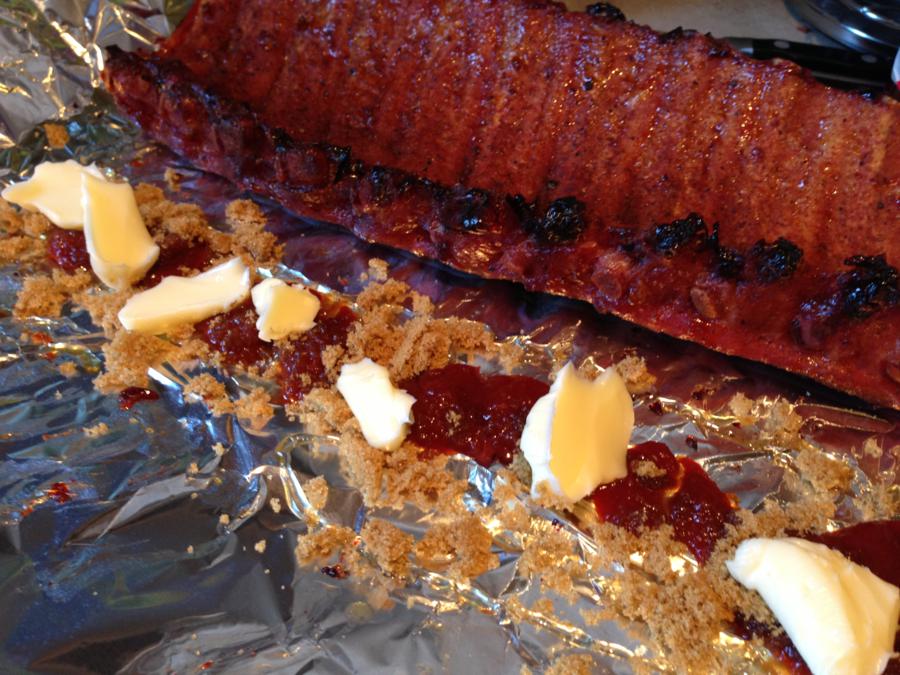
The Texas Crutch
After 2 hours, I take the ribs off, and set them on a sheet of aluminium foil. In the middle of the foil, I put down a layer of: honey, brown sugar, chili sauce, and margarine. Then I put the ribs meat side down on top of them, and put the same mixture on the bone side, and seal up the aluminium foil nice and tight, usually with a couple of layers. This technique is referred to as the “Texas Crutch”, and the ingredients I put in there will melt down and combine with the juices from the ribs to form a braising liquid to help tenderize and flavour the meat. Once wrapped, the ribs go back on the smoker for an hour.
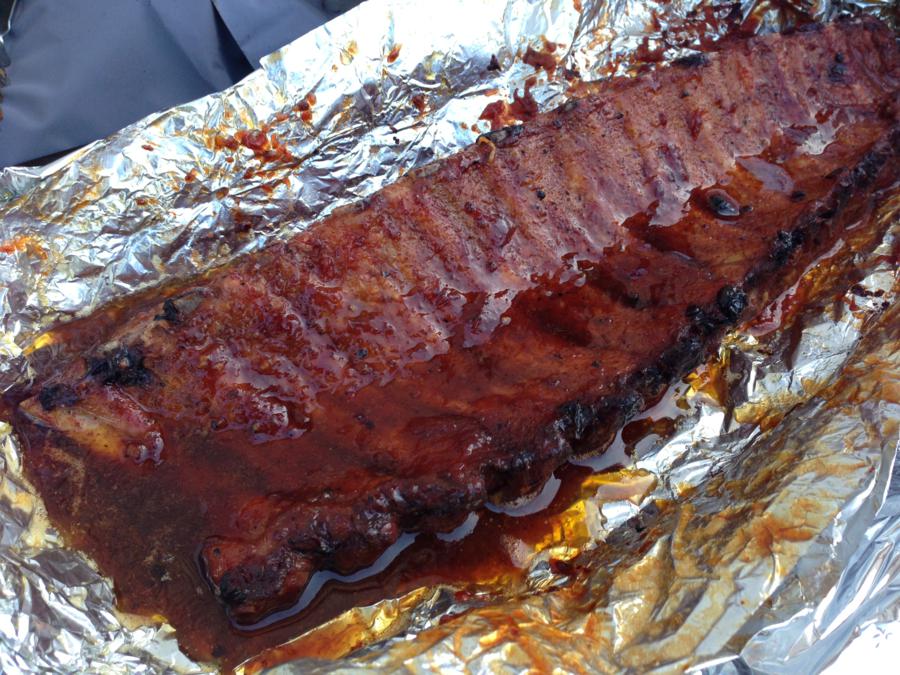
Out of the Foil
After an hour, I unwrap the ribs, being careful to save the braising liquid, then put them back on the smoker, bone side down. I’ll then brush the braising liquid on the ribs to start cooking on another layer of flavour. I normally wait about 20-30 minutes at this point, and then start putting the sauce on.
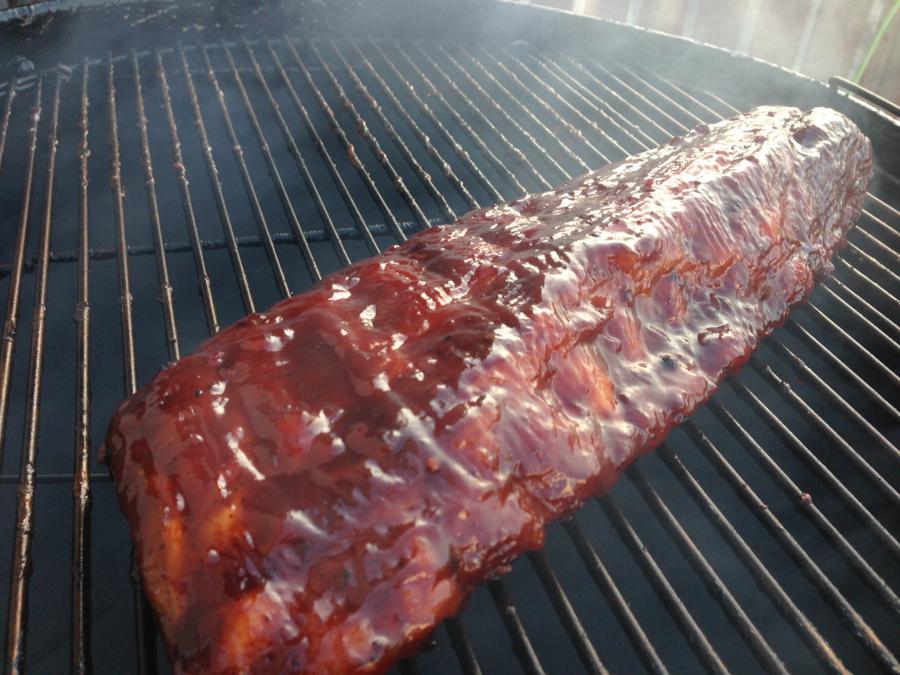
Sauced!
The sauce I used for this rack was a mixture of a commercial BBQ sauce, and some spicy pepper preserves in a 2:1 ratio. Sometimes I’ll use a fruit based preserve, and sometimes I’ll add some hot sauce. Sometimes I’ll make my own sauce and use that. I’m still experimenting with different recipes, so this is my go to for now.
The other thing I do once I take the ribs out of the foil is to start checking if they are done. For ribs I don’t bother checking the meat temperature. Instead I use a toothpick, and put it into the meat between the bones. If it goes through easily, the ribs are done. Once you’ve tried it a bunch of times, you’ll figure out the exact feeling that you’re looking for to tell if they’re done or not.
Once they’re done, I carefully take them off the smoker to avoid messing up the sauce for presentation, and let them rest for about 10-15 minutes before cutting them. I smoke over hardwood and charcoal, so the ribs get a nice smoke ring, caused by a chemical reaction with the smoke that cures the meat as it cooks and leaves it with a beautiful reddish-pink ring around the meat.
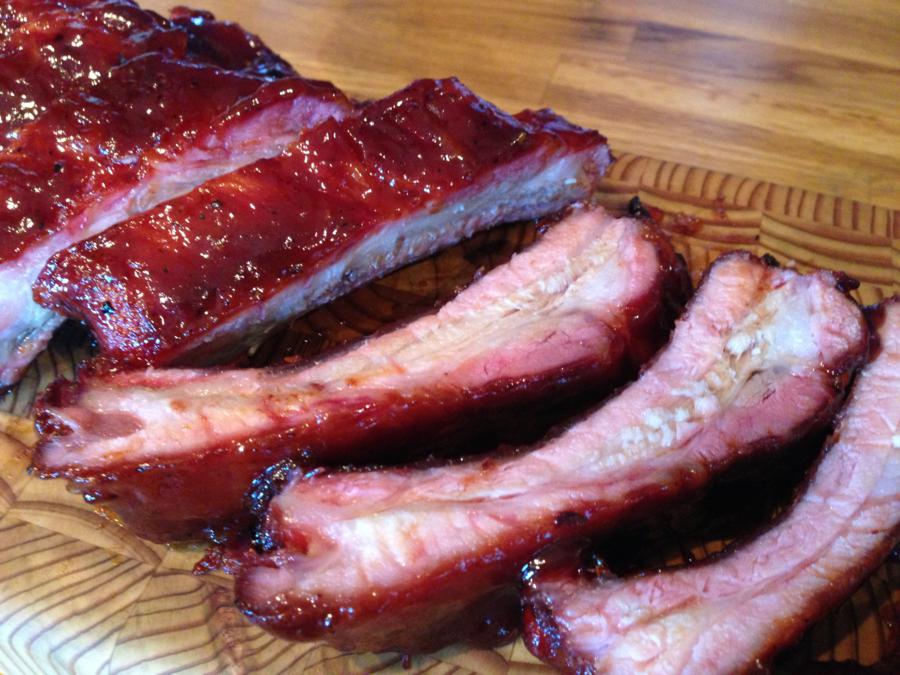
Done!
That’s my process for competition baby back ribs. I hope you enjoyed reading this, and want to give it a try for yourself. For a great explanation of how to setup any kind of BBQ or Grill for smoking, check out Amazingribs.com. If you enjoyed this article and want more like it, please like the MeatVentures Facebook page to be kept up to date on all future content!